
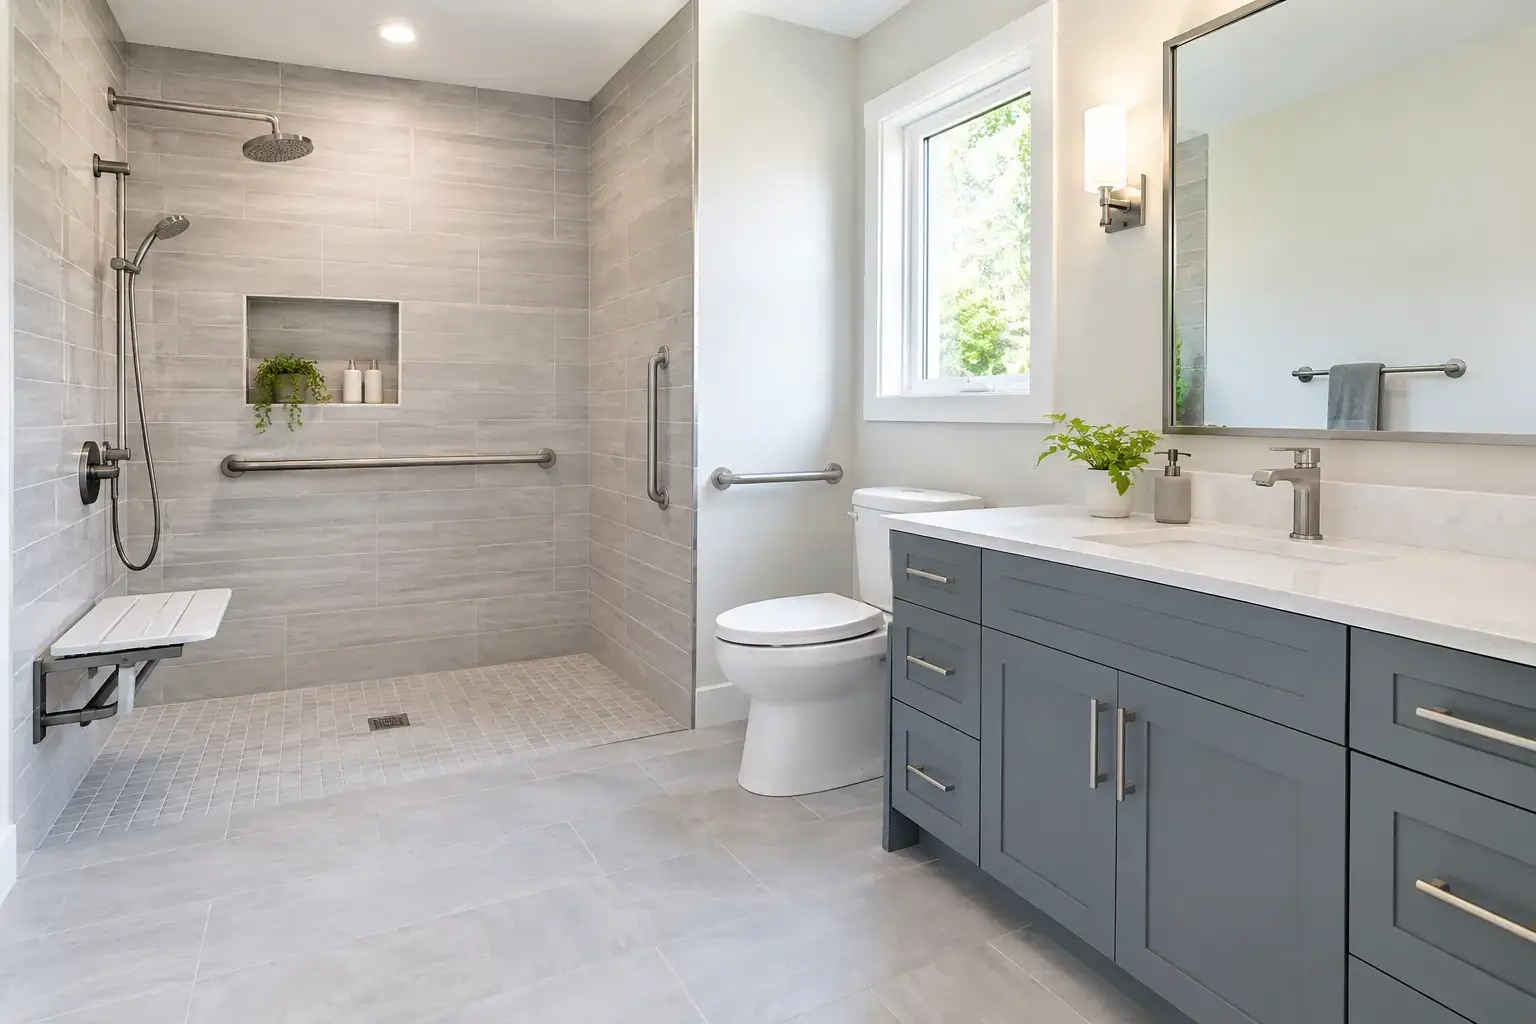
A bathroom can look updated and still become difficult to use the moment someone needs a little more room, a steadier surface, or an easier way into the shower. When homeowners ask how to design accessible bathroom spaces, the answer is not one specialty fixture. It is a set of layout and construction decisions that make daily routines safer and less frustrating without making the room feel clinical.
For many New Jersey homeowners, this work happens during a primary bath remodel, a tub-to-shower conversion, or after finding water damage behind old tile. The right time to plan for accessibility is before demolition, when walls, plumbing locations, floor height, and shower drainage can still be considered together.
Start With the Way the Bathroom Is Used
Accessible design should fit the person using the room now and the way the household may use it later. A homeowner recovering from surgery may need a stable shower entry and grab-bar backing. Someone planning to remain in their home long term may want fewer level changes and more open floor space. A guest bath may need a practical layout that works for children, visitors, and older relatives.
Begin with the daily path through the room. Can a person open the door, reach the vanity, turn toward the toilet, and enter the shower without squeezing around a fixture? A wider room is helpful, but smart fixture placement often matters more than square footage.
In older Essex and Morris County homes, bathrooms can be narrow, with plumbing stacked in locations that limit changes. Moving a toilet or main drain can be worthwhile, but it adds demolition, plumbing work, and sometimes structural adjustments. Keeping plumbing near its existing location can control the scope, while a different vanity depth, door swing, or shower shape may create the usable space you need.
How to Design an Accessible Bathroom Layout
A clear floor area is the foundation of the plan. As a practical target, allow a pathway of about 36 inches where possible. A larger open area near the shower and vanity gives someone room to turn, use a walker, or have another person assist them. The exact dimensions depend on the room, the user, and local permit requirements, so the layout should be measured in the actual house rather than planned only from a listing photo or rough sketch.
Door placement deserves attention early. A bathroom door that swings into a tight room can block access to the vanity or toilet. In some layouts, changing the swing direction or using a pocket door can recover valuable space. Pocket doors are not right for every wall because framing, plumbing, and electrical lines may be in the way. They also need to be installed carefully so the finished door operates smoothly.
Vanity choices can make a major difference. A floating vanity keeps the floor visible and easier to clean, while an open area below the countertop can allow a seated user to approach the sink. A standard cabinet vanity provides more storage, which may be the better choice for a busy family bath. The decision is not all or nothing. A custom vanity can combine accessible knee space at one end with drawers and cabinets at the other.
Consider the mirror, lighting controls, and outlets as part of the same reach range. A well-placed mirror and easy-to-reach switch are small details, but they matter every day.
Build the Shower Around a Safe Entry
A low-threshold or curbless shower is often the center of an accessible bathroom. It removes the raised edge that can become a trip point and creates a cleaner transition from bathroom floor to shower floor. But it only works when the floor structure, drain location, and tile assembly are planned correctly.
A curbless shower still needs slope. Water must move reliably to the drain without creating a floor that feels awkward underfoot. Large-format tile can look clean and modern, but smaller tile is often easier to slope around a drain and can provide more grout joints for traction. The right material depends on the shower size, drain type, finish, and maintenance preferences.
A linear drain can support a single-plane shower floor in some designs. A center drain may work well with a more traditional sloped tile floor. Neither option is automatically better. What matters is proper waterproofing beneath the tile, a consistent slope, and a shower entry that contains water during normal use.
At GUS SKYY Construction, Schluter waterproofing goes behind every shower we build. This matters especially in older homes, where opening a shower can reveal soft subflooring, stained framing, or damage from a slow leak behind old tile. Tile and grout are finish materials, not the waterproof layer. The system behind them is what protects the structure.
A built-in bench can be useful for shaving, resting, or bathing while seated. It does take up shower space, so it should be sized around the actual shower footprint. A fold-down seat can be a better fit in a smaller room. Either way, the wall needs solid backing before tile goes up.
Choose Materials That Support Footing and Maintenance
Bathroom flooring should be selected for wet feet, cleaning, and long-term wear, not just color. Matte porcelain tile is a common choice because it handles moisture well and comes in many sizes and finishes. A textured surface can improve footing, though very rough tile may be harder to clean. Ask to see and touch samples before selecting a finish.
Avoid creating unnecessary transitions between the bathroom floor and shower. Where a transition is needed, keep it low and intentional. A thick rug can also become a trip hazard, especially if it slides on tile. If a bath mat is used, choose one that stays in place and does not curl at the edges.
Lighting should reduce shadows around the shower entry, toilet, and vanity. Recessed ceiling lights provide general light, while vanity lighting helps with grooming. A night-light setting or low-level lighting can make late-night trips to the bathroom easier without waking everyone in the house.
Ventilation is not optional in a full bath. A properly sized exhaust fan helps control moisture that can affect paint, grout, drywall, and framing. During a remodel, it is worth checking whether the existing fan actually vents outdoors and whether the duct route is practical. In some older homes, this is where hidden conditions change the work scope.
Plan for Support Before the Walls Close
Grab bars are easier to install safely when the wall is prepared during framing. Blocking can be installed behind tile at the shower entry, inside the shower, and near the toilet, even if you do not want visible bars right away. This preserves options without forcing a particular look today.
Do not rely on a decorative towel bar for support. It is not built for that load. Purpose-made grab bars come in finishes that can coordinate with faucets and hardware, so they can look deliberate rather than institutional.
A handheld shower on an adjustable slide bar gives flexibility for seated or standing use. Place the controls where they can be reached without stepping fully into the spray. Thermostatic temperature control can also help prevent sudden temperature swings, particularly in homes where other fixtures may be used at the same time.
Make Room for Real-World Construction Decisions
An accessible remodel is not simply a matter of selecting fixtures. Township permits may be required when plumbing, electrical, ventilation, or structural conditions are involved. Once demolition begins, a contractor may find uneven framing, undersized vents, damaged subflooring, or plumbing that does not match the original plan. A clear written scope should explain what is included, what existing conditions may require further work, and how changes are handled.
A primary bath we finished in Stewartsville included a low-threshold shower, full-height tile, a custom vanity, and carefully planned open floor space. The finished room felt like a polished primary bath first, while the practical details made it easier to use. That is the goal: design that supports independence without sacrificing the look of the home.
Before choosing tile, confirm the layout. Before closing walls, confirm backing for future support bars. Before setting the shower floor, confirm the drain and slope. These decisions are difficult or costly to revisit after the room is finished.
GUS SKYY Construction is registered and insured, NJ HIC Reg. #13VH10766600. We provide a free in-home estimate, a clear written scope, pricing by phase before work starts, and one point of contact through final walkthrough. If you are planning an accessible bathroom remodel in Essex or Morris County, request a free estimate and bring your daily needs, room measurements, and wish list to the conversation.