
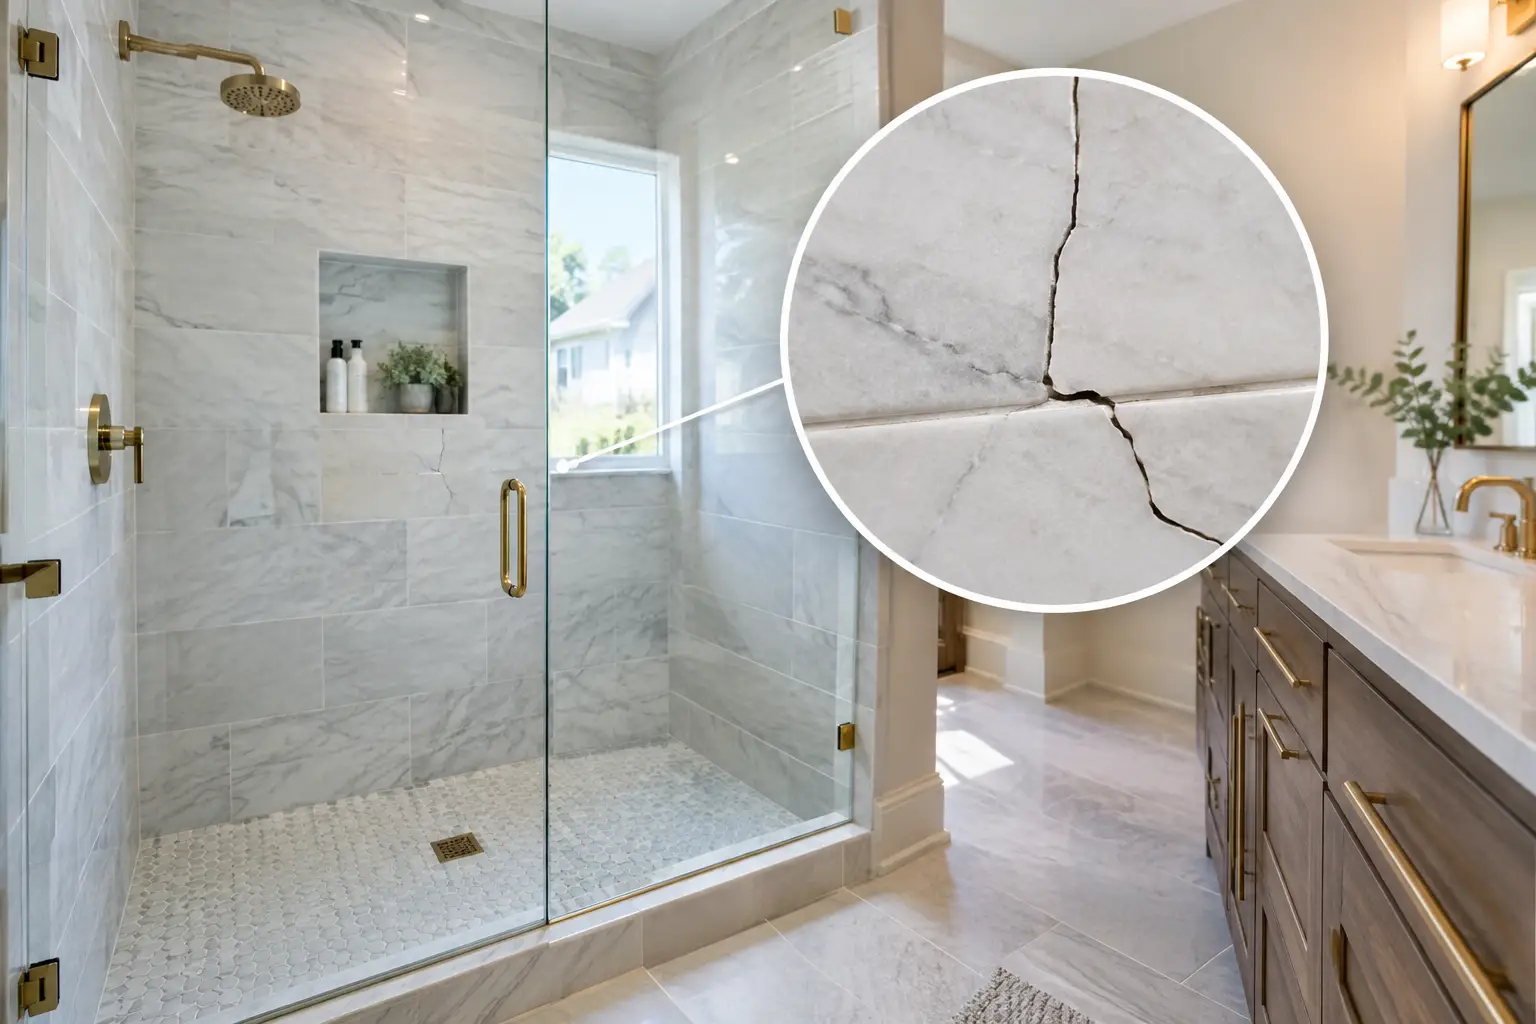
A crack that begins at one shower tile can be a small cosmetic issue, or it can be the first visible sign of movement or moisture behind the wall. What causes shower tile cracks is usually not the tile itself. Tile is hard and stable. It cracks when the surface underneath it shifts, flexes, expands, or loses its bond.
For New Jersey homeowners, the answer often involves the age of the house. A 1950s bath may have layers of past repairs, wood framing that has moved over decades, or water damage hidden behind original tile. A newer shower can crack too, especially when the substrate, waterproofing, or movement joints were not handled correctly.
What causes shower tile cracks most often?
The location and pattern of the crack matter. A single cracked wall tile near a shower valve has different likely causes than several cracked floor tiles running in a line. A contractor should inspect the tile, grout, framing, shower pan, and any evidence of moisture before deciding whether a spot repair makes sense.
Movement in the wall or floor
Homes move. Wood framing expands and contracts with seasonal humidity. Floors flex slightly under weight. Settling can create minor shifts over time, particularly in older homes around Livingston, Montclair, Summit, and surrounding areas.
Tile does not flex with that movement. If the wallboard or floor beneath the tile moves beyond what the tile assembly can tolerate, the stress can show up as a cracked tile, cracked grout, or both. Long cracks that continue across several tiles often point to movement in the substrate or framing rather than a defect in one tile.
Shower floors are especially sensitive. A floor that feels soft, bouncy, or uneven may have a subfloor issue. In a second-floor bath, water damage around a toilet, tub, or shower can weaken plywood and framing long before it becomes visible from below.
Incorrect or deteriorated substrate
Tile needs a stable, suitable surface. Drywall is not an appropriate backing inside a tiled shower unless it is part of a specific approved waterproofing assembly. Standard drywall, damaged cement board, poorly fastened backer board, or a wall that was never made flat can all lead to cracks and loose tile.
Large-format porcelain makes substrate problems more noticeable. A 24-by-48-inch tile spans more area than a small subway tile. If the wall is not flat or the floor has a low spot, the tile can be forced into position during installation and remain under stress. It may crack later, sometimes months after the work appears complete.
The same principle applies to shower floors. Mosaic tile is common because the smaller pieces follow the slope to the drain and provide more grout lines for traction. Installing a large tile on a shower floor without the right layout and slope can create pressure points, poor drainage, and eventual cracking.
Water getting behind the tile
Grout and tile are not the waterproof layer. They are the finish surface. A properly built shower needs a continuous waterproofing system behind the tile, tied into the shower base and drain connection.
When water gets behind tile through failed grout, open corners, a poorly sealed fixture penetration, or missing waterproofing, it can damage the backing and framing. The damage may remain hidden until tiles loosen, grout begins cracking repeatedly, paint peels in the adjoining room, or a ceiling below develops a stain.
A crack does not automatically mean the shower is leaking. But a crack paired with a musty odor, recurring mildew, soft drywall outside the shower, or dark staining in a ceiling below deserves prompt attention. Caulking over the visible crack may hide the symptom while water continues traveling behind the wall.
Missing movement joints at changes of plane
The corners where two tiled walls meet, and where a tiled wall meets a shower floor or tub deck, are areas of expected movement. These joints should not be treated exactly like the middle of a tiled wall. They need a flexible sealant designed for wet areas, not rigid grout alone.
When grout is used in every corner, it often cracks because the two surfaces move independently. This is one of the more common and less alarming crack patterns, provided the tiles remain firmly bonded and there is no evidence of water damage. Still, it should be evaluated and corrected so the joint can stay sealed.
Poor thinset coverage or installation conditions
Tile must be supported evenly by the mortar behind it. Voids leave unsupported areas that can crack when pressure is applied or when the building moves. Poor coverage is particularly risky on shower floors, curbs, niches, and large-format tile.
Installation conditions also matter. Rushing tile over an uneven wall, using the wrong mortar for the tile size, or setting tile before a substrate is properly prepared can shorten the life of the installation. A crack that appears soon after a remodel may indicate an installation issue, but the cause still needs to be traced rather than assumed.
How to read the crack pattern
A hairline crack through one tile can result from an isolated impact, such as a heavy bottle dropped on a shower floor. If the tile is otherwise secure and the surrounding grout is stable, a targeted repair may be possible.
A straight crack that continues through grout joints and multiple tiles is more concerning. It often follows a seam in the backing board, a framing line, or a moving section of floor. Multiple loose tiles, hollow sounds when tiles are lightly tapped, or widespread cracked grout can indicate a bond or moisture problem behind the entire tiled area.
Pay attention to where it happens. Cracks near the shower curb can point to movement at a highly used transition. Cracks around the valve wall may relate to an oversized opening or poorly supported area around plumbing. Floor cracks near the drain can relate to inadequate support, an improperly built base, or movement beneath the pan.
When a tile repair is enough and when it is not
Replacing one cracked tile can be reasonable when the cause is clearly isolated. For example, an impact-damaged floor mosaic or one tile cracked during a fixture replacement may not require a full shower rebuild. The replacement tile must match, and removing it should not compromise the waterproofing behind it.
A repair is less reliable when tile cracking is paired with signs of movement or moisture. If the shower floor flexes, several wall tiles are loose, the curb has cracks, or there is staining outside the shower, replacing surface tile alone does not solve the underlying issue. The affected shower may need demolition down to sound framing and rebuilding with a properly sloped base and continuous waterproofing.
This is also the time to consider layout changes that improve daily use. In a primary bath we finished in Stewartsville, opening the shower footprint allowed for better drainage planning, full-height tile, and a more practical niche location. Finished bathroom photos and walkthrough videos can help homeowners compare layouts before finalizing a scope.
What a proper shower assessment should include
Before approving a repair or remodel, ask for a clear explanation of what is causing the crack and what will be opened to verify it. An inspection should consider the condition of the surrounding walls, the floor structure, the shower curb, the drain area, plumbing penetrations, ventilation, and moisture evidence outside the shower.
In an older New Jersey home, the scope may also need to account for permits and existing conditions behind the walls. Township requirements vary by project. Homes built before 1978 may also require lead-safe work practices when painted surfaces will be disturbed outside the tiled area.
A written scope should separate cosmetic tile work from correction of damaged framing, subflooring, plumbing, or waterproofing. That distinction matters because hidden damage can change the work after demolition. A careful contractor explains those possibilities before work begins rather than treating them as an afterthought.
How to prevent cracked tile in a new shower
Prevention begins before tile is selected. The framing and subfloor need to be sound and flat. The shower base needs the correct slope toward the drain, without low spots where water can sit. The waterproofing must cover the wet area continuously and be properly connected at corners, seams, niches, curbs, and plumbing openings.
Material selection matters, but details matter more. Large-format tile can create a clean look with fewer grout lines, though it requires flatter walls and careful installation. Small mosaic tile works well on shower floors because it conforms to the slope and improves footing. Flexible joints belong at changes of plane. Good bath ventilation helps reduce moisture load after every shower.
At GUS SKYY Co, every shower we build includes Schluter waterproofing behind the tile. We provide a clear written scope, pricing by phase before work starts, and one point of contact from demolition through the final walkthrough. GUS SKYY Construction LLC is registered and insured: NJ Home Improvement Contractor reg. #13VH10766600. We are a NARI Certified Kitchen & Bath Remodeler (CKBR), NTCA member, EPA Lead-Safe Certified Firm (NAT-F269467-1), Woman-owned, and rated 4.9 stars on Google.
A cracked shower tile is worth investigating before it becomes a larger water or structural repair. If you are planning a shower repair, tub-to-shower conversion, or full bathroom remodel, request a free in-home estimate from GUS SKYY Co. We can assess the condition behind the visible crack and help you choose a scope that addresses the cause, not just the surface.