
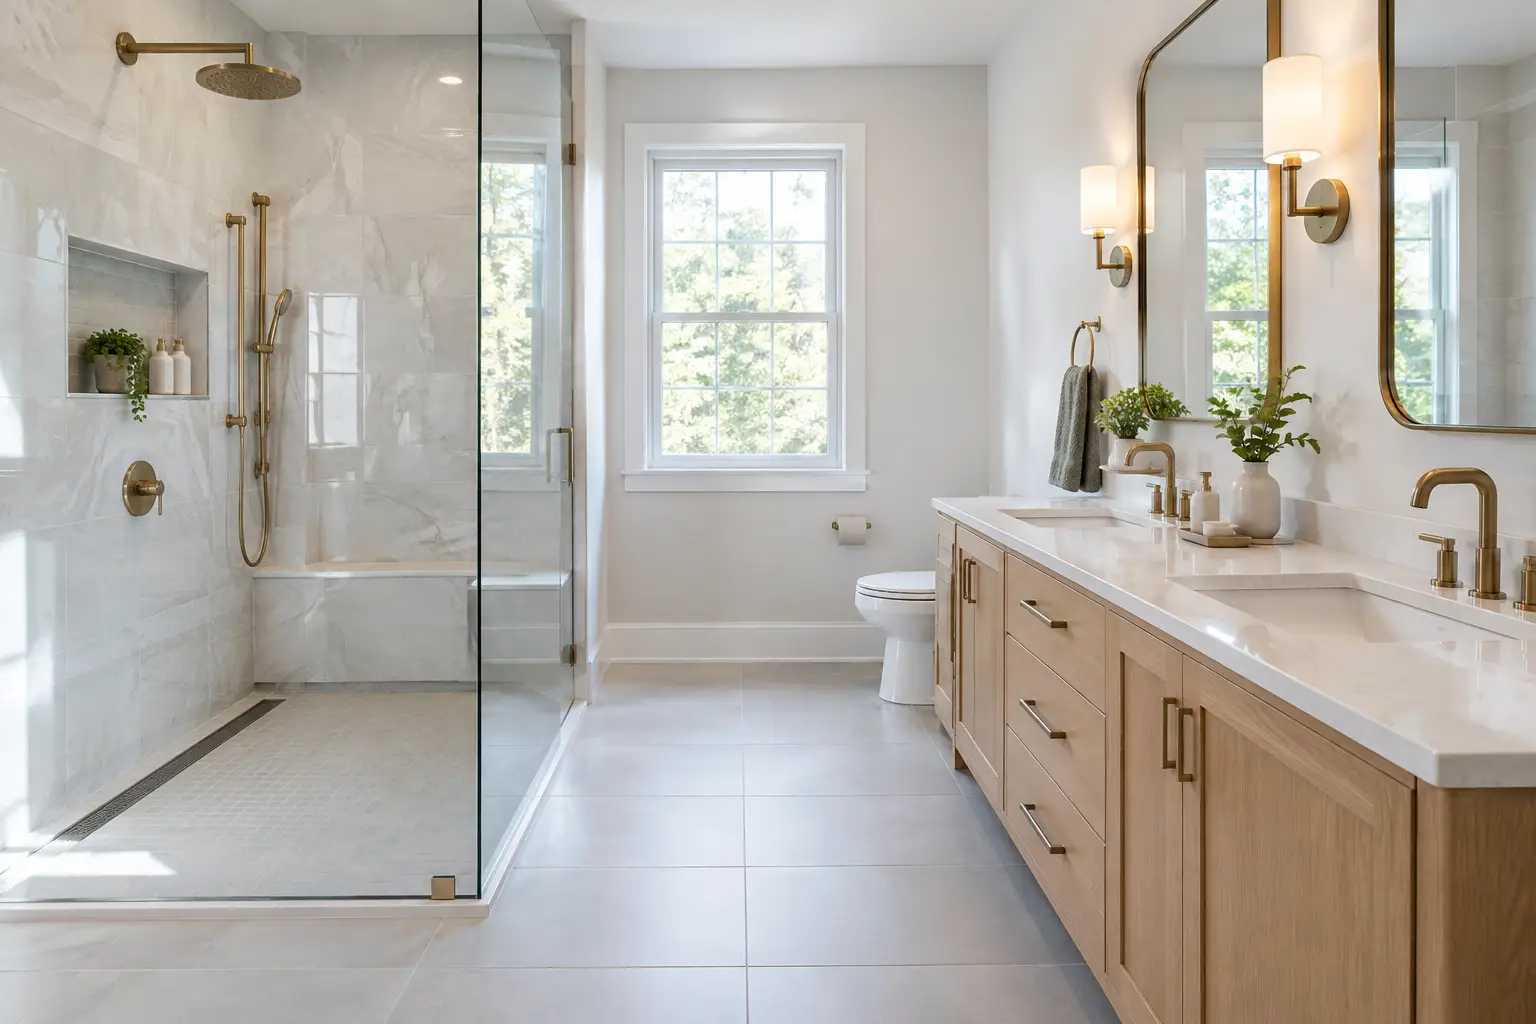
A bathroom does not need to look clinical to work well as you get older. The best bathroom layouts for aging in place simply make daily routines easier: fewer tight turns, less stepping over edges, dry floors, useful lighting, and support where you need it. The right plan also gives you a bathroom you will enjoy now, not one you have to adapt after a fall or mobility change.
For most New Jersey homeowners, the strongest starting point is a walk-in shower, an open route from the door to each fixture, and room to use the vanity and toilet without feeling boxed in. The exact layout depends on the room’s size, plumbing locations, and the condition behind existing walls and tile.
Start With a Clear Path Through the Room
Aging-in-place planning is often described as a product list. Layout comes first. A grab bar helps, but it cannot fix a toilet squeezed between a vanity and a tub or a shower door that blocks the only clear route through the room.
Aim for a clear walking path of at least 36 inches where the room allows. That is a practical target for everyday comfort and makes the space easier to navigate with a cane, walker, or helping hand nearby. A wider turning area is even better, especially in a primary bath where two people may use the room at once.
In older Essex, Morris, and Union County homes, walls and fixture locations may have been set decades ago around a smaller tub and narrow vanity. Moving plumbing can improve the layout, but it adds work inside walls and below floors. In a second-floor bathroom, the structure, drain location, and ceiling below can all affect what is realistic. A good remodel plan weighs those gains against the added scope rather than moving every fixture by default.
The Best Bathroom Layouts for Aging Use a Walk-In Shower
A curbless shower is often the most useful change in an aging-in-place bathroom. Instead of stepping over a tub wall or raised shower threshold, you walk into a shower floor that slopes gently to the drain. This reduces a common trip point and makes the room easier to use if mobility changes later.
A shower around 36 by 60 inches gives many homeowners a comfortable footprint. If the room permits, 42 by 60 inches or larger creates more elbow room and better access for a shower chair or caregiver. A compact shower can still work in a guest bath, but avoid making it so small that the door, controls, and user compete for the same space.
The entry matters as much as the size. A fixed glass panel can keep water contained while leaving a wide opening. A swinging glass door needs clear floor space outside the shower. Sliding doors save swing space but require tracks that need regular cleaning and can limit the usable opening. For some layouts, a properly sized opening with a glass panel is the simplest answer.
Curbless construction must be planned before demolition ends. The shower floor needs the correct slope, and the waterproofing must connect properly at the drain, walls, corners, and outside edges. Tile alone is not waterproof. GUS SKYY Co uses Schluter waterproofing behind every shower we build because the hidden work is what protects the framing and rooms below.
Choose a small-format floor tile or another slip-resistant tile with enough grout joints for traction. Large-format porcelain can look clean and modern, but it is not always the right shower-floor material because it is harder to slope cleanly around a drain. A linear drain may allow larger pieces in some designs, though drain placement and floor framing still need review.
Place the Controls Where You Can Reach Them
Put the shower valve near the entry, not on the far wall. That lets you turn on and adjust water before stepping under it. A handheld shower on a slide bar adds flexibility for seated use, rinsing, and cleaning, while a separate fixed showerhead keeps the routine familiar.
Plan blocking inside the walls for future grab bars even if you do not want visible bars now. Blocking is inexpensive to add while the walls are open. It gives you secure mounting options near the shower entry, along the control wall, and beside the toilet later. Towel bars, suction accessories, and standard drywall anchors are not substitutes for properly installed grab bars.
A built-in bench can be useful, but it should fit the room and the person using it. A full-width bench takes shower space. A folding wall seat can preserve standing room in a narrower shower. Either way, it needs waterproof construction, a slight slope toward the shower floor, and thoughtful placement so it does not interfere with the controls.
Give the Toilet Room Enough Elbow Room
The toilet is often where an otherwise attractive bathroom becomes frustrating. Leave comfortable side clearance where possible, with room for stable hand placement and future support bars. A toilet placed too close to a vanity or wall is difficult to use and harder to clean.
A comfort-height toilet can reduce the distance of sitting and standing for many adults. It is not automatically right for everyone, especially shorter users, so sit on a similar-height model before making a final choice. Wall-hung toilets can free up visual floor space, but they require an in-wall carrier and may not suit every budget or wall condition.
If the bathroom has a separate toilet closet, check the door swing. An inward-swinging door can create a trap if someone falls behind it. Outswinging or pocket-door solutions can help, but a pocket door requires enough open wall space and may conflict with electrical, plumbing, or structural elements. This is one of those decisions that depends on what is inside the wall.
Use a Vanity That Works Seated or Standing
A floating vanity makes the floor easier to clean and can create toe room, but it needs proper wall support and may offer less storage than a full cabinet. A furniture-style vanity provides more enclosed storage, though legs and deep drawers can reduce clear approach space.
For a primary bath designed with flexibility in mind, consider a vanity with one open knee space or a section that can be modified later. Place mirrors low enough for seated users to see themselves, and use pull-out drawers rather than deep cabinets when possible. Drawers make toiletries easier to reach without kneeling or bending into the back of a cabinet.
Keep outlets accessible at the vanity and use layered lighting. Overhead lighting alone creates shadows at the face and can make a wet floor harder to see. Vanity lights at face level or on both sides of the mirror improve daily grooming. A quiet, properly vented exhaust fan is also essential in a tiled bathroom, where trapped humidity encourages moisture problems over time.
Common Layouts That Work Well
A single-wall bathroom can work well when a shower, toilet, and vanity line up along one long wall, leaving an open passage on the opposite side. It is often a practical option in a narrow hall bath. The trade-off is that each fixture needs careful spacing so the room does not feel like a corridor.
An L-shaped layout places the shower on one wall and the vanity or toilet on the adjacent wall. This can make a small room feel more open and creates a natural dry zone near the entry. It is often a good fit for tub-to-shower conversions when the existing tub sits at the far end of the room.
For a larger primary bath, a wet-room-inspired layout can place a curbless shower behind a fixed glass panel, with open floor space around it. This requires meticulous waterproofing, floor slope, and ventilation because more of the room may be exposed to water. It can be elegant and practical, but it is not the right answer if the room cannot accommodate the drainage plan.
We completed a primary bath in Warren County with a walk-in shower and a layout centered on clear movement between the vanity, toilet, and shower entry. Finished bathrooms with photos and walkthrough videos can help homeowners compare these choices in real rooms, not just on a floor plan.
Plan for What Existing Walls May Reveal
Aging-in-place work is a good time to address hidden conditions, not cover them up. In older homes, demolition can reveal water damage behind old tile, undersized ventilation, unprotected shower walls, or previous plumbing repairs. Homes built before 1978 may also require lead-safe practices when painted surfaces are disturbed.
Township permits may be needed when a remodel includes plumbing, electrical, ventilation, or structural changes. Permit needs vary by scope and municipality. A clear written scope should identify what is being changed, what may require inspection, and what allowances may be needed if concealed conditions appear.
GUS SKYY Co is registered and insured under NJ Home Improvement Contractor reg. #13VH10766600, is a NARI Certified Kitchen & Bath Remodeler (CKBR), an NTCA member, and an EPA Lead-Safe Certified Firm (NAT-F269467-1). The team provides a free in-home estimate, a price by phase before work starts, and one point of contact from demolition through final walkthrough.
The right aging-in-place bathroom is not about adding every accessibility feature at once. It is about choosing a layout that removes the hard parts of daily use while protecting the home behind the finished tile. If you are considering a walk-in shower, tub-to-shower conversion, or a full primary bath redesign, request a free in-home estimate to talk through what your room can support.